Death and Rebirth

Death and Rebirth

532f33d70325dcfd65937458da0489f1

The Life/Death/Life nature is a cycle of animation, development, decline and death that is always followed by re-animation. This cycle affects all life and all facets of psychological life. Everything – the sun, novas and the moon as well as the affairs of humans and those of the tiniest creatures, cells and atoms alike – have this fluttering, then faltering, then fluttering again.

– Clarissa Pinkola Estes, Women Who Run With The Wolves

I look at an empty page, a blank canvas of possibility. I bring my fingers to the keyboard and they tap tap tap nervously as my mind grasps for a sliver of inspiration. All at once it occurs to me – I haven’t written a single word in over 18 months.

Much of the time I’ve spent away from writing has been spent swimming in a deep sea of pain. It’s the most profound pain I’ve felt, the deepest sense of loss I’ve known. Some feel pain like this and they shrivel up; they stop relating to others; they hide away and try to make sense of it. What the fuck does it all mean? How can I give of myself when I feel so destroyed and lost inside my own heart, my own mind? Others use that pain as fuel for a bottomless well of creativity. I’ve always found myself to be a part of the former category. Even now I find it difficult to express wounds into words. What I think I’ve come away with in this dark hour of my being is this: death begets life. All that pain – all that suffering – it was simply deeply ingrained parts of me falling away. It was mind numbingly painful. At times I didn’t think I could withstand it. I nearly lost one of my most important relationships in the midst of the anguish. I see now – it was a great blessing. Today I feel new -reborn. From that desolation I’ve learned an incalculable lesson that will guide me in my journey until my very last breath.

I am becoming keenly aware of life’s intrinsic need for death. I have a gorgeous banana plant in my home – browning leaves need to be removed in order for new growth to sprout. The plant as a whole is much healthier for the pruning. Mature flowers on a rose bush need to be picked to make way for new budding life, berries need to be plucked, and so on and so forth. To hold on to the dying parts of our selves is a useless practice in vanity. I fought that truth for along time. No more. Shedding that old, dry skin has left me lighter and more able to see my own divinity – my own bright light.

A few of the most important things I have recently released:

  1. My need to be perfect – I am exactly where I am supposed to be right now. All of my flaws, all of my short comings are perfect opportunities for reflection and a deep dive toward inner knowing – a step on the path of realizing myself as a fully embodied human. If I can get cozy in my quirks and learn to love ALL of me then I can really begin to release that which does not serve me. Fighting against something is the surest way to make it bigger and stronger. Until that sweet moment when you’ve really learned and moved through a life lesson and integrated it into your life – you are presented with the same challenge over and over and over again. This will always be the reality. Bottom line? Stop fighting myself and embrace it all. The utter shit, the pure bliss and the monotony.
  2. My need to be right – My ego sure loves to win. She fears losing (being wrong) so much that she will go as low as to hurt others, just to save herself from the agony. I am getting to know my ego on a more intimate level and realize that I have endless compassion for her. How sad to be constantly measuring yourself against others, to feel so insecure that you are always trying to prove your worth. In the past I have fought against my ego. I’ve even tried to disengage from it entirely. I told myself that If I could just let go of my ego I could achieve enlightenment. I know now that is impossible. If I am to be a human being on this earth then my ego will always be a part of my journey. Without it I am not an individual, I become a part of the whole again or in essence, I die. So to be alive and to be human means to dance with the light and shadow sides of the ego. So, today I welcome her AND yet – I do not let her control me. Because when does stubbornness and being right help the spirit to shine and grow? I choose to be open to the possibility of the moment and to the truth that I still, and always will, have A LOT to learn.
  3. My need for everyone to like me – I need to like me. That’s it. If I truly accept myself then others will accept me too – and if they don’t? They will move along down the road and so will I. Life in this vessel is too short to waste precious moments trying to prove my worth to anyone. I can’t even begin to express how good the integration of this truth feels. It has taken over a decade of work to get here. Not sure what clicked exactly – but I’m grateful it did. LIBERATION!!
  4. That I have nothing of value to share – I am unique. There is no other person on the planet that is my exact equal. No one else has lived my life. Everything I have to say is special simply because it comes from my unique vantage point. I do not need years of schooling and accolades from others to measure my worth. I have been so scared to speak my mind and share my truth in fear of it not being interesting enough or backed by enough degrees. FUCK THAT. I have much to share and I am done waiting.

So here I am world! Get ready to hear more from me. I hope to hear from all of you too because our ability to connect, understand and empathize with one another is one of the most valuable aspects of being in this human body. I LOVE YOU!


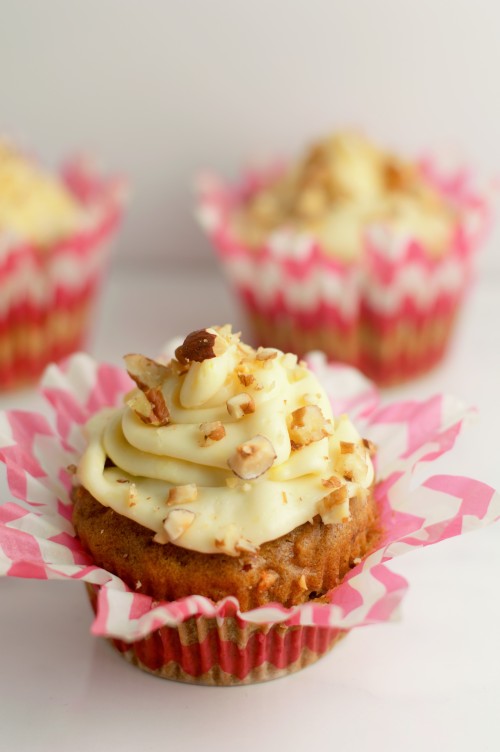
Gluten Free Carrot Cake Cupcakes

Gluten Free Carrot Cake Cupcakes

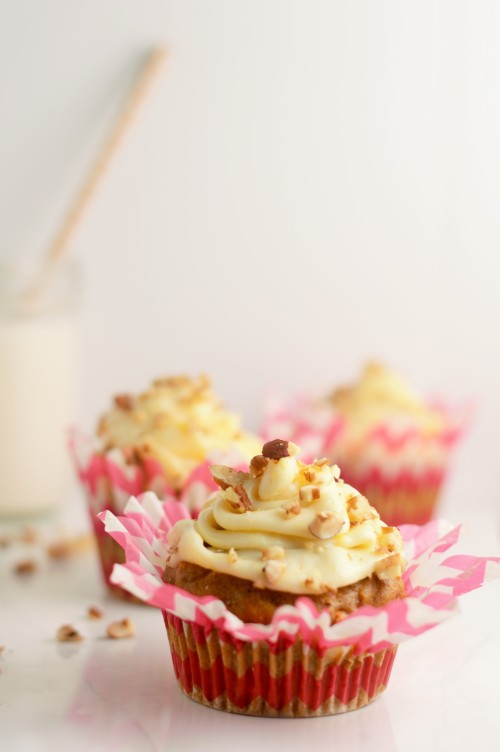
You know that feeling you get when you finally perfect something you’ve been working on for a long time? If you haven’t yet experienced that gratifying moment, I truly hope you do some day because let me tell you, it is incredible. Unfortunately, it is rare that I experience this feeling… primarily because I have a hard time sticking with new things. If I’m not innately good at something I often tire of it quickly. The one area of my life where this is not the case is cooking. Perhaps it’s the fun I have in the kitchen with my husband, maybe it’s the pleasure I get in watching my family enjoy a dish that I’ve nailed or maybe it’s the simple knowing that without food there is no life. Poetic isn’t it? Whatever the reason, I resiliently move forward and get back in my kitchen every single day no matter how bad any single dish turns out and believe me there are plenty. It is because of this persistence that I can finally say I have made the perfect gluten free cupcake.

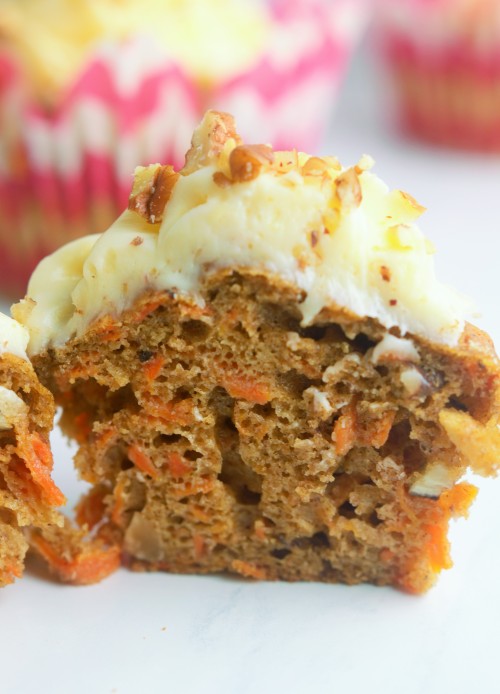
For those of you who are new to gluten free baking, I don’t want to scare you off but I have been gluten free for over 4 years and I am just now starting to understand the subtle nuances of making a gluten free baked good comparable to a regular baked good. I’ve lost count of how many times I’ve started baking with the best intentions and ended up with a dry, crumbly or unpleasantly dense pastry. Not this time my friends. This cupcake is so perfect. Oh did I already use that word already? Sorry, I just can’t help myself! It’s chewy on the outside and moist and fluffy on the inside. Can a cupcake be tender? I swear this one is.

The only thing I used to sweeten the cupcakes themselves was 1/4 cup maple syrup, that’s only 3 grams of sugar per cake. Not bad huh? The frosting adds another 7 grams but you can always use less frosting or omit it completely if you are trying to cut back on your sugar intake. In fact, this cupcake is so delicious without the frosting that you could easily scrape it off, call it a muffin and enjoy without the extra sugar! I for one am relishing in my indulgences this winter so feel free to just pass over that unwanted frosting to me, thank you very much. 😉

Gluten Free Carrot Cake Cupcakes

DSC_0005 (3)


Cupcake Ingredients

  • 1/2 cup sweet rice flour
  • 1/2 cup tapioca flour
  • 1/4 cup sorghum flour
  • 1/4 cup teff flour
  • 3/4 tsp baking soda
  • 1 tsp salt
  • 1 tbsp cinnamon
  • 1 tsp ground nutmeg
  • pinch of ground cloves
  • 1/2 cup finely chopped pecans
  • 1/4 cup finely chopped hazelnuts
  • 3 eggs
  • 2 1/4 cups grated carrots (approximately 3 medium carrots)
  • 1/4 cup maple syrup
  • 2 tsp vanilla
  • 1/4 cup avocado oil (any vegetable oil will do)
  • 1/2 cup yogurt

Cupcake Process:

  1. Preheat oven to 375 degrees.
  2. In a large mixing bowl, combine the flours, baking soda, salt and spices.
  3. In another bowl, whisk together the eggs, oil and maple syrup.
  4. Stir in the carrots, yogurt and half of the hazelnuts and pecans to combine.
  5. Add the wet ingredients to the dry ingredients and mix until incorporated.
  6. Pour into paper lined cupcake tin.
  7. Bake for 20-25 minutes depending on your oven. I always check by sticking a toothpick into the center. If it comes out clean, you are done!
  8. Let cool on cooling rack and await frosting.

Frosting Ingredients

  • 6 oz cream cheese (3/4 of a package)
  • 3 tbsp butter
  • 3/4 cup powdered sugar
  • zest of one lemon
  • juice of half a lemon

Frosting Process

  1. Add all ingredients to a mixing bowl
  2. Using a hand or stand mixer, whip until light, creamy and spreadable
  3. Add remaining nuts to the top for garnish and crunch


DSC_0028 (2)

DSC_0018 (2)


Perfect Lentil Soup

Perfect Lentil Soup

Although autumn arrived last month, Northern California clearly hasn’t gotten the memo. In late October we were still enjoying the spoils of 70+ degrees. I’m sure you are appalled at someone complaining about such ‘perfect’ weather but hey, sometimes you just want to layer! I love summer as much as the next girl but just like a house guest over staying their welcome, one soon tires of being sweaty. Every year around early September I eagerly await the changing colored leaves and smell of pumpkin bread wafting out of my kitchen. But much to my chagrin, this year it seemed that summer just didn’t want to let go… Finally on one glorious morning a few days ago, I woke to a brisk 50 degrees and excitedly brought my knit scarves and cozy boot socks out from hibernation.

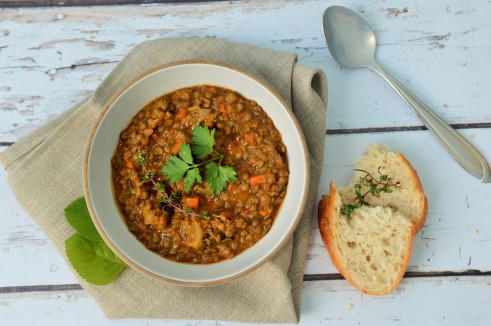
As the chill in the air grows ever stronger and the nights grow ever longer I am inspired to stay home, cuddle up to my family and enjoy hot soup out of well insulated mugs. A tried and true staple in my home is lentil soup. I’ve been playing with this recipe for years and with each little tweak it further evolves into one of my favorites. As with any good recipe you can use the bare bones of this to experiment and make it your own. Spices and veggies can be tweaked to your liking and you can puree a lot or a little depending on your preference. I prefer mine heavy with tomato and spice and pureed just a little so I can still experience the texture of the ingredients.

Perfect Lentil Soup

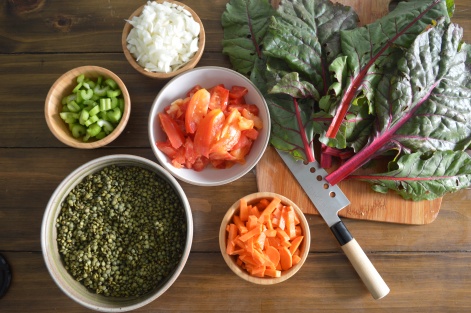
Ingredients

DSC_0735

  • 4 tbsp coconut oil or ghee
  • 1 yellow or white onion, chopped
  • 2 organic carrots, chopped
  • 2 organic stalks of celery, chopped
  • 3 tsp salt
  • 1 3/4 cups dried lentil soaked for 12-24 hours
  • 1 quart (4 cups) bone broth or veggie broth for a vegan option
  • 1 large organic heirloom tomato, chopped
  • 1 tsp coriander
  • 1 tsp cumin
  • 1 tsp turmeric
  • black pepper to taste
  • 1 bunch organic Swiss chard, de-stemmed and torn into manageable bites

Process

  1. Place coconut oil or ghee in a large dutch oven over medium heat until oil is hot
  2. Add onion, carrot, celery and salt and cook for about 5 minutes
  3. Add lentils, broth, tomatoes and spices, increase heat and bring to a boil
  4. Once boiling, reduce heat to low, cover and simmer for about 25 minutes
  5. Add Swiss chard and with pot uncovered gently cook until tender, about 8-10 minutes.
  6. Take soup off heat and using an immersion blender, puree soup ever so slightly to add a creaminess without losing the texture of the lentils and vegetables.

DSC_0781 (2)

Gluten Free Sweet Potato Carrot Muffins

Gluten Free Sweet Potato Carrot Muffins

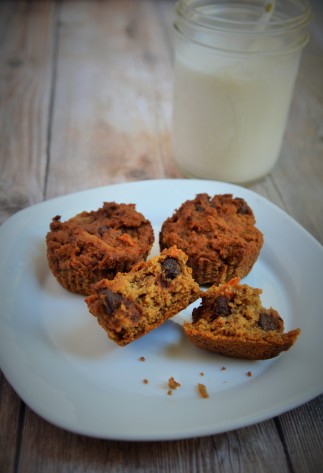
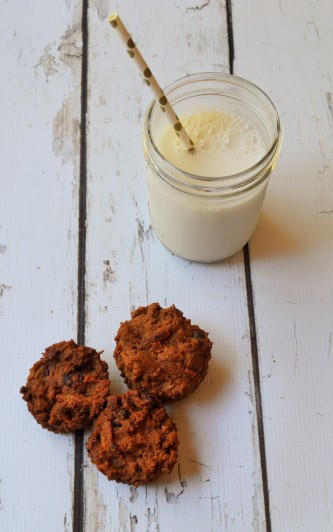
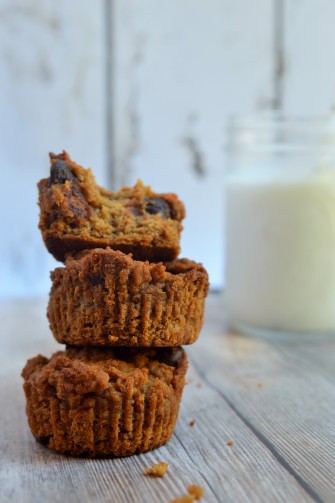
Hot muffins right out of the oven. Is there anything better? That smell that permeates your kitchen and any other room with door left ajar… simply heaven. I make sure to close all windows and open the door to my bedroom while I bake so that when my head rests on my pillow that night I am lulled to sleep with the delicious scent of baked goods dancing in my nostrils. These muffins are to die for. The sweet earthly flavors of the sweet potato and carrot are a perfect match with the cinnamon and garam masala. Throw in some eggs, coconut oil, almond milk, coconut sugar and a dash of honey and you have a winning muffin. These taste reminiscent of carrot cake. With crispy edges and a moist and fluffy inside, my husband, daughter and I quickly gobbled them up. Breakfast dessert never tasted so good. 😉

Gluten Free Sweet Potato Carrot Muffins

~Makes about 18 muffins~

DSC_0031 (2)

Ingredients

  • 1 baked organic Japanese yam or any variety or sweet potato
  • 1 1/2 organic shredded carrots
  • 2 farm fresh eggs
  • 1/2 cup coconut sugar
  • 1/4 cup honey
  • 3/4 cup almond milk
  • 3/4 cup melted coconut oil
  • 1 1/2 cups All Purpose gluten free flour blend, I used this
  • 1 tsp baking soda
  • 1 tsp baking powder
  • 1 tsp cinnamon
  • 1/2 tsp garam masala
  • 1/2 tsp salt
  • 5 oz dark chocolate chips, I used ghiradelli’s 70% and loved the slight bitterness

Process

  1. Bake sweet potato on 400 for 40 minutes, once cooled, peel skin off and discard
  2. Lower oven to 350 degrees
  3. In a large bowl, beat eggs, sugar, honey, sweet potato, coconut oil and almond milk until smooth
  4. Add carrots and gently mix in
  5. In a medium bow, whisk dry ingredients together
  6. Add dry ingredients to wet ingredients and stir until combined
  7. Fold in chocolate chips
  8. Grease muffin liners and fill 3/4 of the way full with batter
  9. Bake for 25 minutes or until inserted toothpick comes out clean

I enjoyed these best in the morning with a cup of coffee or tea, they were also a delicious mid day snack, and absolutely scrumptious for dessert… I guess what I’m saying is these muffins are perfect just any old time. 😉

DSC_0015 (2)

DSC_0051 (2)

Turkish Cacik

Turkish Cacik

Hello loves! I feel like it’s been ages since I was last in this space, yet sitting down to write this post feels as natural as ever. I have been very busy these last few months! I am very proud to say that I manifested my hearts desire to move my family back up to Mendocino! It took about a year and a half to fully realize this dream but it has been worth every moments wait. We are staying with our beautiful and gracious friends until we find a place of our own. We are just so very grateful for them. Every morning I step outside to the sound of birds chirping and wind rustling through the leaves of towering redwood trees. My breaths are full and complete and the air that fills my lungs is clean, filled to the brim with oxygen. When the wind is blowing just so you can even taste the salty ocean from a few miles away. I’m blessed with a family of deer that graze in our front yard and a special secret clearing in the woods that Marvel and I visit many times a week. Life is good here. My heart is home. My heart is happy.

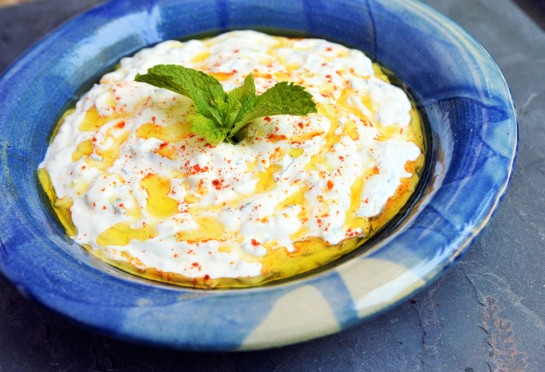
I have been filling my days connecting with friends, doing the occasional massage and mothering my little Marvel. I have also been working on an exciting new project. I won’t get into much detail until it’s farther along in it’s process but I will tell you that my husband and I are working together (which I’m just beyond thrilled about) and that we are creating beautiful Mediterranean food. This is something that we’ve been wanting since we first fell in love and we are finally making something happen. It feels damn good. 🙂 I’d love to share a little recipe from the project with you. It is called Cacik, pronounced Jajik. It is the Turkish version of the Greek dish, tzatziki. It is often served as a dip or dressing but some people eat it on it’s own. I like to use mine as a sauce inside a falafel wrap or as a dip for chicken kebabs.

Cacik is traditionally made with yogurt but I find it a bit too soupy that way. We’ve substituted Labne, Mediterranean yogurt cheese which is very simply yogurt with the water strained out. Imagine sour cream and cream cheese’s love child. Have I peaked your interest? I thought so. It is as scrumptious as it sounds. It is a staple in our home and it is perfect in this dish.

Cacik is made with wholesome ingredients and although it has a rich creamy flavor, it is high in healthy fats, calcium, protein and vitamins A and C. Eat this and you are simply winning all around.

Turkish Cacik

cacik

Ingredients

  • 16 oz labne (Mediterranean Yogurt Cheese)
  • 1/2 English Cucumber, grated
  • 2 tbsp mint, minced
  • salt to taste, I used approximately 1 tsp
  • olive oil, drizzled on top
  • paprika, sprinkled on top

Process

  1. Place labne, english cucumber, mint and salt in a bowl, stirring with a spoon to combine
  2. Drizzle olive oil on top
  3. Sprinkle paprkia on top
  4. Serve as a dip for pita bread, falafel, chicken… or simply eat alone as a snack
Vegan Strawberry Banana Sherbet

Vegan Strawberry Banana Sherbet

It’s starting to feel like summer in Fremont. Temperatures have been hitting 90 nearly every day and the sun has been relentless. I got a burn after only 10 minutes in my backyard! It’s true I am pretty pasty but usually I can go at least 20 minutes before becoming a lobster. 😉

What do I crave on hot summer days? An ice cold beverage, maybe a dip in the ocean and always ice cream. I’ve been staying away from most dairy lately as I’ve noticed it stuffs me up and makes me a little sluggish. I do however still enjoy my butter/ghee. It is one of my favorite things on this earth and I must have it on my toast in the morning. It makes me too happy inside to give it up. Besides, I believe good quality grass fed butter is a health food… in responsible quantities of course. Butter is loaded with the vitamin K-2 and the anti-inflammatory fatty acid, Butyrate. These are very important nutrients for heart and bone health.

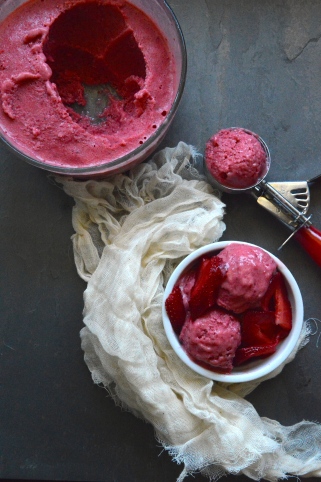
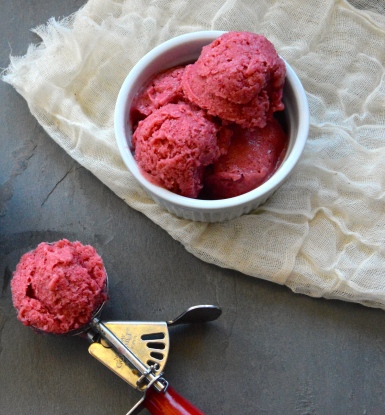
That was a bit of a tangent wasn’t it? … you can tell I love my butter. 😛 ANYWAY, since I’ve been avoiding most dairy I have been satisfying my hot day ice-cream craving with homemade vegan sorbet instead. It is so easy and delicious you guys, if you haven’t tried it, you MUST. All you need for homemade sorbet is any combination of frozen fruit and a blender. Seriously. It’s amazing.

Lately though I’ve been craving more of a sherbet, something with a little creaminess to it. So… I just added a little coconut cream to my frozen fruit and voila! A vegan sherbet with no refined sugar and a whole lot of hot day ice cream craving satisfaction. My ice cream maker is in storage so I needed to use a little elbow grease to get this creamy but I’ll tell you it was well worth it.

Vegan Strawberry Banana Sherbet

DSC_1491

IngredientsMakes about a pint

  • 1 1/2 frozen bananas
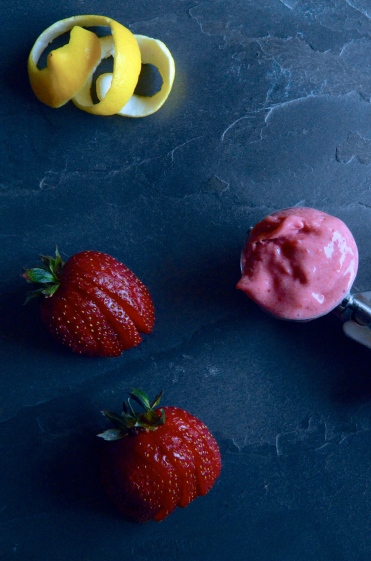
  • 15 frozen organic strawberries
  • 1/2 cup coconut cream (I skim the cream off the top of a chilled can of coconut milk) 
  • 1/8 cup honey
  • 1 tbsp lemon juice
  • 1 tsp vanilla

Process

  1. Add all ingredients to food processor and process until combined and creamy. This took me about 5 minutes because the strawberries were so hard.
  2. Pour sherbet into mixing bowl and place in freezer for about 20 minutes.
  3. Take bowl out of freezer and vigourously whisk for a minute,
  4. Place back in freezer for another 30 minutes
  5. Repeat the process another 2-3 times
  6. Let sherbet harden in the freezer for another 2 hours or so
  7. Using an Icecream scoop, doll out your deliciousness!
  8. Keep sherbet in an airtight container in the freezer

I would recommend taking your sherbet out of the freezer about 15-30 minutes before enjoying (depending on the temperature of your house) The consistency is softer and creamier when it’s a little less frozen. Just make sure you don’t let it become a smoothie. Unless of course you feel like one! ❤

XO ~ Sam

DSC_1451

DSC_1455

DSC_1478

All Natural Teeth Whitening Powder

All Natural Teeth Whitening Powder

When a few magical things are happening for me simultaneously, I feel like a total goddess. Don’t you just love that feeling? You are head to toe sparkly and move through your day floating on air. First thing I need to feel this way is glowing skin. I can achieve this by drinking plenty of water, breaking a sweat nearly every day and using an ultra moisturizing face cream every night. Next thing I need is flowing, shiny, effortlessly lustrous hair. I achieve this by washing my hair only twice a week, rinsing with apple cider vinegar and touching up with dry shampoo when I feel a little greasy. Finally, I feel my most goddess like when my teeth are ultra white. There are few things on earth more attractive to me than a pearly set of chompers. Aside from a nice eager pair of listening ears and a beautiful compassionate heart of course. 🙂

I have used practically every whitener on the market today to attain those pearly whites. Unfortunately, most commercial teeth whiteners contain abrasive chemicals that strip your teeth of their enamel leaving them more sensitive to hot, cold and cavities. I know a lot about cavities. I’ve suffered through roughly 15 cavities in my 30 years in this body. I finally decided that it was time for me to find a better way.

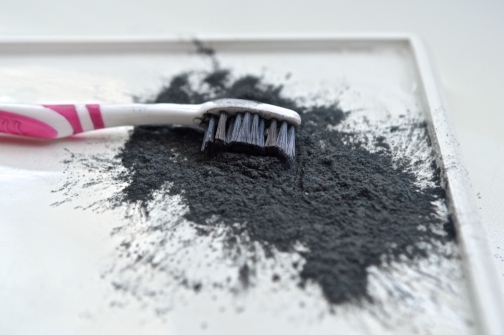
A few months ago, I began experimenting with activated charcoal for it’s teeth whitening abilities. Activated charcoal’s natural adhesive qualities allow it to bind with surface-staining culprits like coffee, tea, wine, and plaque… hello naturally glistening smile! Eagerly, I made my own paste using coconut oil and activated charcoal; I began brushing with it every few days before my regular brushing routine in the evening. I noticed a slightly whiter smile after the very first brushing but after a few weeks, I began to notice my teeth appeared to be getting MORE yellow. I was puzzled, a little disappointed even but resolved not to write the stuff off before doing a little more research. After some investigative googling, I discovered that coconut oil can actually yellow your teeth. AHA! That meant that activated charcoal was still on the table for an effective natural whitener.

After further internet exploring I concluded that bentonite clay would be a fabulous little addition to the activated charcoal paste. Bentonite clay binds to unhealthy substances around the teeth, on the tongue and gums, and helps to remove them before they create plaque. It is also full of vitamins and minerals that are beneficial to teeth and gums.

Another powerhouse for strengthening and cleaning teeth is arrowroot powder. Arrowroot powder is excellent for maintaining a balance between acid and alkaline levels as it is rich is many minerals including calcium. These minerals will help to remineralize the tooth enamel and prevent cavities. Winning!

With their powers combined, these three can conquer even the most intense surface stains and leave behind an absolutely beautiful white smile. Now, I have a pretty bad ass little whitening powder that is all natural and completely free of chemicals, preservatives or fragrances… all that yucky stuff you don’t want anywhere near your mouth. I’d love to share my recipe with you all. Hopefully you will find it as illuminating as I did. 🙂

All Natural Teeth Whitening Powder

DSC_1238

Ingredients

  • 2 tbsp bentonite clay
  • 1 tsp activated charcoal
  • 1 tsp arrowroot powder
  • 5 drops peppermint essential oil

Process

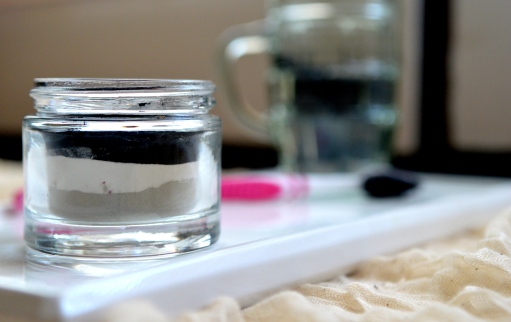
  1. Mix first three ingredients together in a glass jar or a tin… whatever you have on hand
  2. Add in peppermint essential oil and stir together
  3. Before each use, liberally wet your tooth brush, sprinkle some powder onto your brush and brush like normal
  4. After a few minutes, rinse out your mouth
  5. You can be finished here or you can brush again with your regular toothpaste if you so desire.

DSC_1231

My hubby has dealt with yellow teeth for… well forever. He started drinking black tea at a pretty young age, this is common in Armenian households, so his teeth bear the stains of this. Here is a photo of his teeth in the late summer of last year,

DSC_0498

Here is a photo of his teeth today, after brushing with my whitening powder every few days for two weeks. I personally can see a big difference!

DSC_1248

Enjoy dazzling the world with your beautiful white smile! Please let me know how this works for you if you try it.

XO ~ Sam

Raw Chia Cardamom Cocoroons

Raw Chia Cardamom Cocoroons

I love cookies. Who doesn’t right? If they weren’t so void of nutrition I’d likely be popping them all day. I used to be able to eat like that. In fact I used to eat so poorly that I’m surprised I didn’t have a coronary by my senior year.

In high school, I’d polish off an entire medium sized dominoes pizza for dinner and about 10-12 chips ahoy cookies for dessert. All.by.my.self. This was only after my McDonalds breakfast of 2 egg, cheese and ham McMuffins with 2 hash browns and my lunch of a double quarter pounder with cheese with a large fry and soda.

Yes… I’m serious. I ate like that nearly every day until I was 18. I was an active teen, playing water polo and swimming and I have good genes so I never gained any weight, regardless of the fact that I rarely ingested anything green or with much fiber. Although I didn’t get fat externally, my organs were obviously bearing the brunt of the abuse. I suffered from rampant infections; bladder, kidney and yeast, had intense heart palpitations, crippling headaches and I was sick 6-8 times a year. All the while I was never able to connect the dots. I had no idea that what I was putting into my body was affecting my health. Nutrition finally came to my rescue after highschool. I became a more aware individual in every facet of my life; I started reading more, expanding my consciousness and quickly concluded that I would die if I kept eating this way. I completely changed my diet for good by age 22, cutting out soda, fast food and gluten and I’ve never looked back. Now when I crave cookies, I make my own.

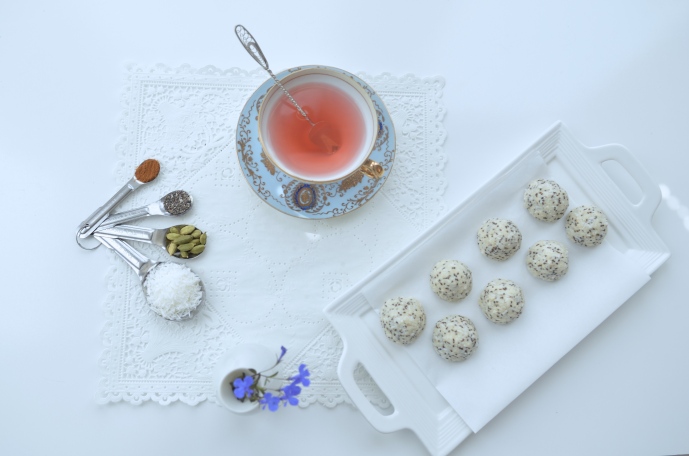
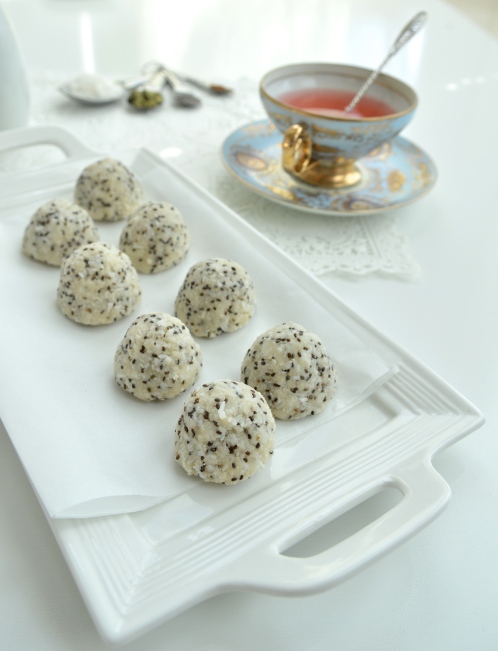
These little babies are bursting with healthy fats, fiber, phosphorus, calcium and manganese. They are still cookies and calorically dense so try your hardest not to eat the whole batch in one sitting. I managed to keep my hand out of the cookie jar after my first two. My little one was not fond of my restraint. She unarmed all of her big guns in trying to get cookie after cookie into her little hands. She’s a master manipulator, this one. She should really teach lessons in ‘getting what you want.’

Now that I’m a mama, I hope that I can strike a balance between guiding my daughter on her own path of healthy eating and letting her indulge once in awhile. Forbidding things seems to be the surest way to get children fixated on them.  Plus, I believe that life is about pleasure. These cookies allow my girl to satisfy her sweet tooth all while I inject her with some much needed nutrition. Everybody wins. 😊

Raw Chia Cardamom Cocoroons

DSC_1210


Ingredients – Makes about 12 golf ball sized cookies

  • 1 1/2 cups shredded coconut
  • 1/2 cup coconut butter
  • 1/4 cup coconut flour
  • 3 tbsp coconut oil
  • 1/4 cup chia seeds
  • 1/4 cup maple syrup
  • 1 1/2 tsp almond extract
  • Seeds from one cardamom pod, grinder

Process

  1. Grind cardamom seeds in spice or coffee grinder
  2. Throw all ingredients in a food processor and process for a few seconds, until batter starts to stick together
  3. Press batter into little macaroon sized balls (or whatever shape tickles your fancy)
  4. Enjoy a few now with a hot cup of tea and save the rest in an air tight container for future taste bud pleasing

DSC_1220

XO ~ Sam

Individual Flourless Chocolate Cakes with Cherry Sauce

Individual Flourless Chocolate Cakes with Cherry Sauce

I’ve never been very good at sharing. I am the oldest of 4 children, so I had my fair share (ha! see what I did there?) of practice. Nonetheless when I started dating my husband and he often recommended we share our dishes at restaurants, I experienced an inner battlefield of indignation. I agreed because I was on my best behavior in this new incredible relationship but inside I was a petulant child; No, it’s MINE!!! It didn’t take too long for him to discover my true selfish colors. When he asked to share my Icecream one day, my pretenses crumbled. I can put on a happy face and share my salad but Icecream is where I draw the line my friends. I do not share things that I lick. Will.not.do.it. No Icecream, no Popsicles, no lollipops and no cereal for that matter. Something about the milk dropping out of your mouth back into the bowl gives me the heeby jeebys. We all have our idiosyncrasies. Thankfully, he loves me anyway and we get along just fine. He stays away from my Icecream and I share nearly every other acceptable meal with him. Relationships are all about compromise people.

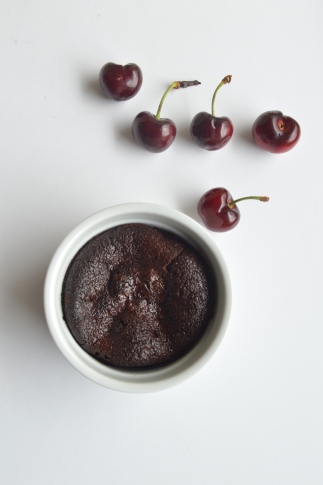
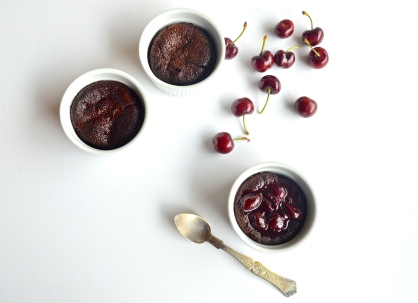
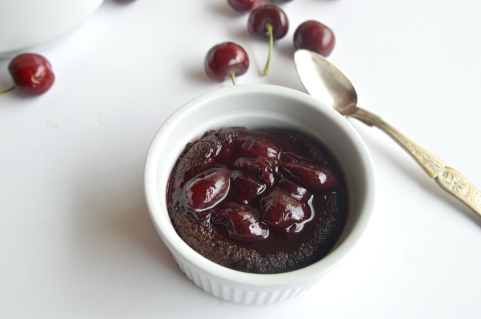
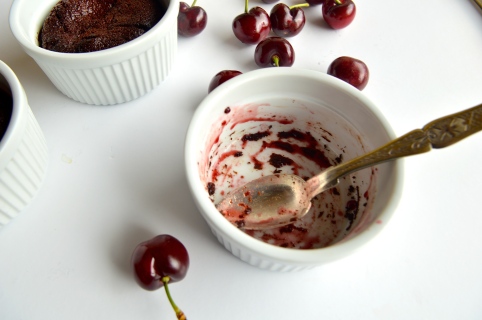
Now, on to cake. Thankfully you don’t have to share this cake. You are not going to want to. You can have your very own ramekin and slurp it down greedily in the corner if you wish. I tried to do that but Marvel’s sweet little face made it impossible. My sharing muscles have been getting a major workout since getting married and having our girl. I just can’t escape the inevitable big blinky eyes coaxing me to give them a bite.

Individual Flourless Chocolate Cake with Cherry Sauce 

Chocolate Cake – Serves 4 

DSC_1106

Ingredients 

  • 4 oz cacao butter
  • 1/2 cup cacao powder, more for dusting ramekins
  • 1/4 cup honey
  • 1/4 cup coconut oil, more for greasing
  • 4 tbsp coconut sugar
  • 3 farm fresh eggs
  • 1 tsp freshly scraped vanilla bean, approximately 2 vanilla beans

Process

  1. Preheat oven to 350
  2. Grease and lightly dust 4 6-8 oz ramekins
  3. Place cacao butter, cacao powder, honey, vanilla and coconut oil in a double boiler or in a glass bowl atop a boiling kettle.
  4. Once cacao butter is completely melted, stir and take off heat
  5. Using a beater by hand, beat sugar and egg until just combined.
  6. Add in chocolate sauce and combine
  7. Pour batter evenly into 4 ramekins
  8. Bake for about 20 minutes
  9. While cake is baking, make cherry sauce

Cherry Sauce

DSC_1122

Ingredients 

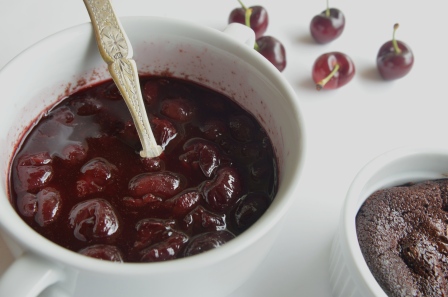
  • 2 cups halved and pitted cherries
  • 1/4 cup maple syrup
  • 1 tbsp balsamic vinegar
  • 1 tbsp lemon juice
  • 1 tsp arrowroot starch

Process

  1. In a saucepan, bring all ingredients except arrowroot starch to a boil over medium heat 
  2. Stir a few times 
  3. After about 3 minutes add arrowroot 
  4. When sauce starts to thicken, 2-3 minutes later, take off heat
  5. Let cool slightly, pour onto cooled cake and enjoy – by yourself or with others if you’re feeling generous 😉

DSC_1145


DSC_1135


DSC_1155


‘Wine tasting in Burgundy’ DIY Lipstick

‘Wine tasting in Burgundy’ DIY Lipstick

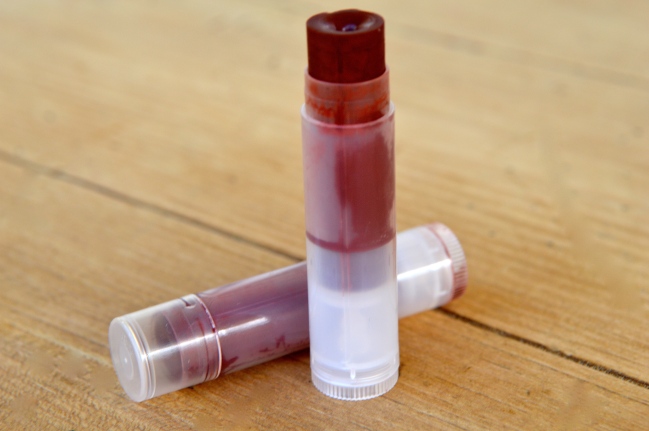
Health is something that I don’t often fully appreciate until it’s compromised. I guess that is one perk of not being well; when you get well again you are so grateful for your vitality that you vow to take better care of yourself from then on. With my health being less than optimal these last few months I decided I needed to get myself back on track. I took myself to a naturopathic physician to find a solution. A bunch of tests were taken and a few things were discovered. First discovery, I have borderline hypothyroidism, which I will get more into another day. Second, my cortisol levels are too high, which I am now controlling with magnolia root. Third, I tested in the high range for a few toxic metals; aluminum and lead. High levels of aluminum in the body has been linked to Alzheimer’s. High levels of lead in the body has been linked to nerve disorders, memory and concentration problems and muscle and joint pain. The aluminum is from using aluminum based non stick cookware and the lead is from using store bought makeup. Crazy isn’t it? I have since thrown out all my cookware and replaced it with either stainless steal or cast iron to reduce my aluminum exposure. I started making my own makeup a few months ago but I didn’t replace everything. Now that I have these results back I am newly committed to replacing all of the toxic makeup in my makeup bag. The only makeup that I use is lipstick, concealer, mascara and very occasionally blush/bronzer for a little sparkle. I made my own organic blush from beets and hibiscus a few months ago so I’ve got that covered. Next and arguably most importantly on my list is lipstick. I wear it nearly everyday and the store bought lipsticks contain unnatural dyes filled with lead. Considering the fact that this stuff goes on your lips, it is safe to assume we ingest a bit of it every time we put it on. I’m done poisoning myself. I can give my lips the color I love without sacrificing my health to do it. I measured, melted and mixed some of my favorite natural ingredients and created a really beautiful, deep red lip color with a hint of purple. I’m simply in love and frankly I’m never buying a lipstick again.

‘Wine Tasting in Burgundy’ DIY Lipstick

DSC_1085

Ingredients – makes about 2-3 lipsticks depending on size of container. I used .15 ml Chapstick tubes

  • 2 grams beeswax  (I use a scale here because hard beeswax is easier to measure this way)
  • 1 tsp mango butter
  • 1 tsp Shea butter
  • 1/2 tsp meadow foam seed oil
  • 1/2 tsp sweet almond oil
  • 1/4 tsp vitamin e
  • 3/4 tsp Australian red reef clay
  • 1/4 tsp bentonite clay 
  • 6 drops essential oil (I used Ylang Ylang)

Process

  1. Melt together butters/oils in a double boiler or in a glass bowl atop a boiling tea kettle
  2. Take off heat and add in vitamin e
  3. In another bowl mix together red reef and bentonite clay 
  4. Add melted oils/butters to clays and mix until well combined 
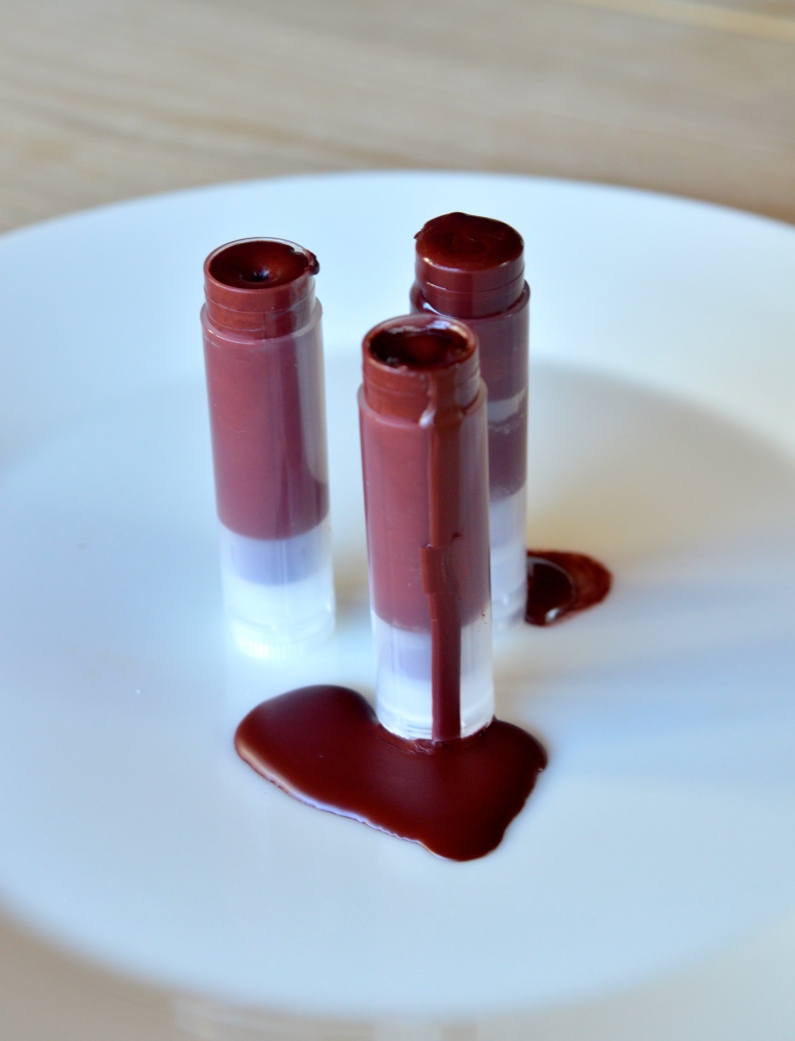
  5. Add in essential oil and pour into tubes
  6. Let sit at room temperature for 15-30 minutes to harden
  7. Apply to lips
  8. Leave natural lipstick marks on a lucky lover

DSC_1066 The rich burgundy color evoked images of me with a wine stained mouth in the rolling green hills of France; hence the title of the lipstick. If your lip color can transport you all the way to Burgundy, you know you’ve got a winner. 😉 If you like your lip color a little less dramatic, just use a little less red reef clay. Enjoy your gorgeous red lips without sacrificing your health. XO ~ Sam