Gluten Free Carrot Cake Cupcakes

Gluten Free Carrot Cake Cupcakes

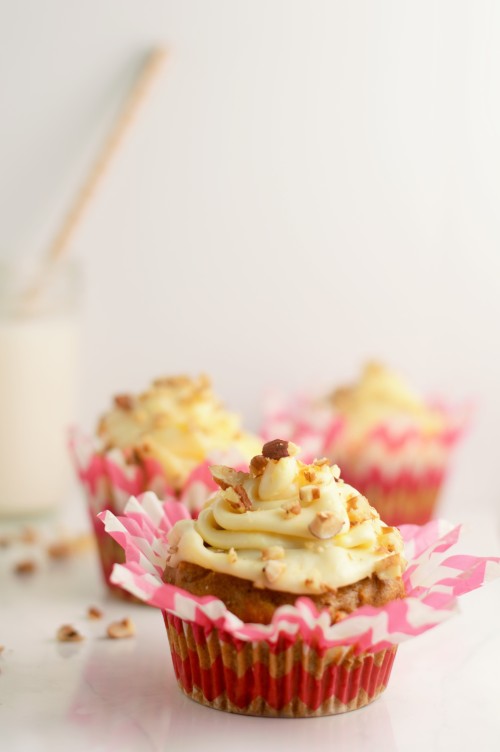
You know that feeling you get when you finally perfect something you’ve been working on for a long time? If you haven’t yet experienced that gratifying moment, I truly hope you do some day because let me tell you, it is incredible. Unfortunately, it is rare that I experience this feeling… primarily because I have a hard time sticking with new things. If I’m not innately good at something I often tire of it quickly. The one area of my life where this is not the case is cooking. Perhaps it’s the fun I have in the kitchen with my husband, maybe it’s the pleasure I get in watching my family enjoy a dish that I’ve nailed or maybe it’s the simple knowing that without food there is no life. Poetic isn’t it? Whatever the reason, I resiliently move forward and get back in my kitchen every single day no matter how bad any single dish turns out and believe me there are plenty. It is because of this persistence that I can finally say I have made the perfect gluten free cupcake.

For those of you who are new to gluten free baking, I don’t want to scare you off but I have been gluten free for over 4 years and I am just now starting to understand the subtle nuances of making a gluten free baked good comparable to a regular baked good. I’ve lost count of how many times I’ve started baking with the best intentions and ended up with a dry, crumbly or unpleasantly dense pastry. Not this time my friends. This cupcake is so perfect. Oh did I already use that word already? Sorry, I just can’t help myself! It’s chewy on the outside and moist and fluffy on the inside. Can a cupcake be tender? I swear this one is.

The only thing I used to sweeten the cupcakes themselves was 1/4 cup maple syrup, that’s only 3 grams of sugar per cake. Not bad huh? The frosting adds another 7 grams but you can always use less frosting or omit it completely if you are trying to cut back on your sugar intake. In fact, this cupcake is so delicious without the frosting that you could easily scrape it off, call it a muffin and enjoy without the extra sugar! I for one am relishing in my indulgences this winter so feel free to just pass over that unwanted frosting to me, thank you very much. 😉

Gluten Free Carrot Cake Cupcakes
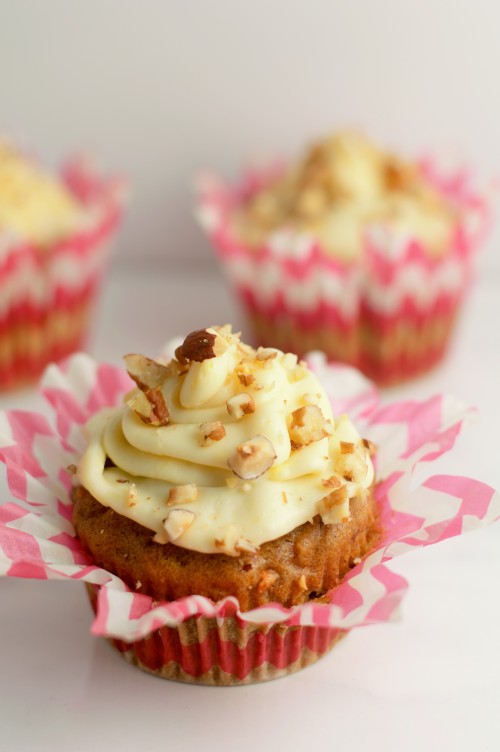
DSC_0005 (3)


Cupcake Ingredients

  • 1/2 cup sweet rice flour
  • 1/2 cup tapioca flour
  • 1/4 cup sorghum flour
  • 1/4 cup teff flour
  • 3/4 tsp baking soda
  • 1 tsp salt
  • 1 tbsp cinnamon
  • 1 tsp ground nutmeg
  • pinch of ground cloves
  • 1/2 cup finely chopped pecans
  • 1/4 cup finely chopped hazelnuts
  • 3 eggs
  • 2 1/4 cups grated carrots (approximately 3 medium carrots)
  • 1/4 cup maple syrup
  • 2 tsp vanilla
  • 1/4 cup avocado oil (any vegetable oil will do)
  • 1/2 cup yogurt

Cupcake Process:

  1. Preheat oven to 375 degrees.
  2. In a large mixing bowl, combine the flours, baking soda, salt and spices.
  3. In another bowl, whisk together the eggs, oil and maple syrup.
  4. Stir in the carrots, yogurt and half of the hazelnuts and pecans to combine.
  5. Add the wet ingredients to the dry ingredients and mix until incorporated.
  6. Pour into paper lined cupcake tin.
  7. Bake for 20-25 minutes depending on your oven. I always check by sticking a toothpick into the center. If it comes out clean, you are done!
  8. Let cool on cooling rack and await frosting.

Frosting Ingredients

  • 6 oz cream cheese (3/4 of a package)
  • 3 tbsp butter
  • 3/4 cup powdered sugar
  • zest of one lemon
  • juice of half a lemon

Frosting Process

  1. Add all ingredients to a mixing bowl
  2. Using a hand or stand mixer, whip until light, creamy and spreadable
  3. Add remaining nuts to the top for garnish and crunch
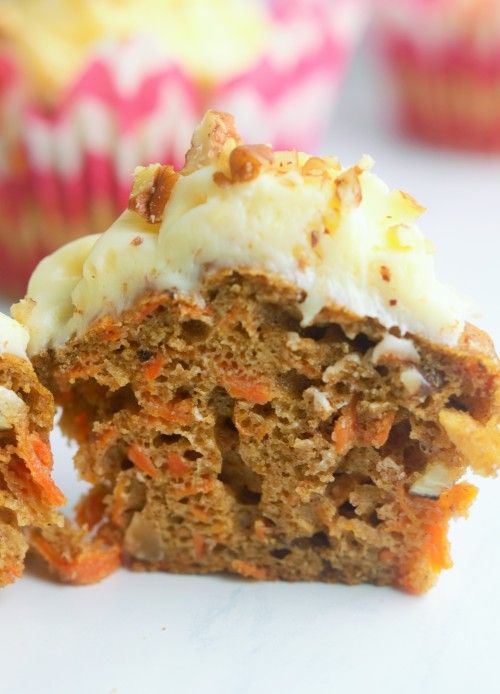
 

DSC_0028 (2)

DSC_0018 (2)


Gluten Free Sweet Potato Carrot Muffins

Gluten Free Sweet Potato Carrot Muffins

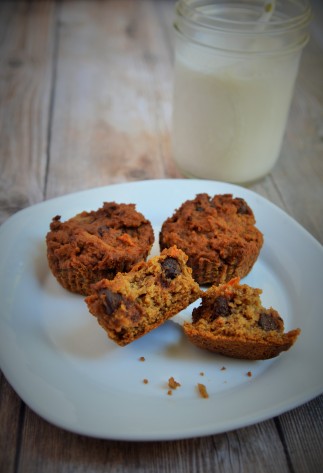
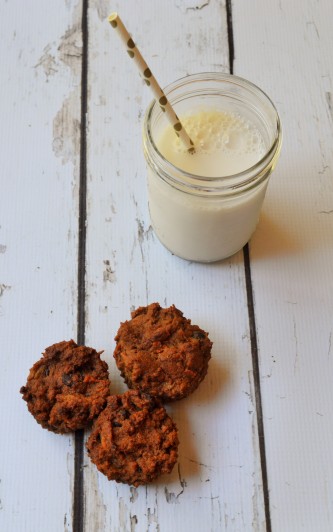
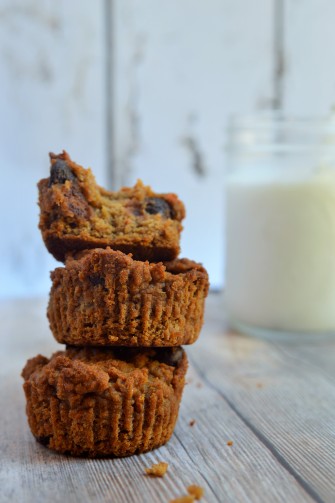
Hot muffins right out of the oven. Is there anything better? That smell that permeates your kitchen and any other room with door left ajar… simply heaven. I make sure to close all windows and open the door to my bedroom while I bake so that when my head rests on my pillow that night I am lulled to sleep with the delicious scent of baked goods dancing in my nostrils. These muffins are to die for. The sweet earthly flavors of the sweet potato and carrot are a perfect match with the cinnamon and garam masala. Throw in some eggs, coconut oil, almond milk, coconut sugar and a dash of honey and you have a winning muffin. These taste reminiscent of carrot cake. With crispy edges and a moist and fluffy inside, my husband, daughter and I quickly gobbled them up. Breakfast dessert never tasted so good. 😉

Gluten Free Sweet Potato Carrot Muffins

~Makes about 18 muffins~

DSC_0031 (2)

Ingredients

  • 1 baked organic Japanese yam or any variety or sweet potato
  • 1 1/2 organic shredded carrots
  • 2 farm fresh eggs
  • 1/2 cup coconut sugar
  • 1/4 cup honey
  • 3/4 cup almond milk
  • 3/4 cup melted coconut oil
  • 1 1/2 cups All Purpose gluten free flour blend, I used this
  • 1 tsp baking soda
  • 1 tsp baking powder
  • 1 tsp cinnamon
  • 1/2 tsp garam masala
  • 1/2 tsp salt
  • 5 oz dark chocolate chips, I used ghiradelli’s 70% and loved the slight bitterness

Process

  1. Bake sweet potato on 400 for 40 minutes, once cooled, peel skin off and discard
  2. Lower oven to 350 degrees
  3. In a large bowl, beat eggs, sugar, honey, sweet potato, coconut oil and almond milk until smooth
  4. Add carrots and gently mix in
  5. In a medium bow, whisk dry ingredients together
  6. Add dry ingredients to wet ingredients and stir until combined
  7. Fold in chocolate chips
  8. Grease muffin liners and fill 3/4 of the way full with batter
  9. Bake for 25 minutes or until inserted toothpick comes out clean

I enjoyed these best in the morning with a cup of coffee or tea, they were also a delicious mid day snack, and absolutely scrumptious for dessert… I guess what I’m saying is these muffins are perfect just any old time. 😉

DSC_0015 (2)

DSC_0051 (2)

Raw Chia Cardamom Cocoroons

Raw Chia Cardamom Cocoroons

I love cookies. Who doesn’t right? If they weren’t so void of nutrition I’d likely be popping them all day. I used to be able to eat like that. In fact I used to eat so poorly that I’m surprised I didn’t have a coronary by my senior year.

In high school, I’d polish off an entire medium sized dominoes pizza for dinner and about 10-12 chips ahoy cookies for dessert. All.by.my.self. This was only after my McDonalds breakfast of 2 egg, cheese and ham McMuffins with 2 hash browns and my lunch of a double quarter pounder with cheese with a large fry and soda.

Yes… I’m serious. I ate like that nearly every day until I was 18. I was an active teen, playing water polo and swimming and I have good genes so I never gained any weight, regardless of the fact that I rarely ingested anything green or with much fiber. Although I didn’t get fat externally, my organs were obviously bearing the brunt of the abuse. I suffered from rampant infections; bladder, kidney and yeast, had intense heart palpitations, crippling headaches and I was sick 6-8 times a year. All the while I was never able to connect the dots. I had no idea that what I was putting into my body was affecting my health. Nutrition finally came to my rescue after highschool. I became a more aware individual in every facet of my life; I started reading more, expanding my consciousness and quickly concluded that I would die if I kept eating this way. I completely changed my diet for good by age 22, cutting out soda, fast food and gluten and I’ve never looked back. Now when I crave cookies, I make my own.

These little babies are bursting with healthy fats, fiber, phosphorus, calcium and manganese. They are still cookies and calorically dense so try your hardest not to eat the whole batch in one sitting. I managed to keep my hand out of the cookie jar after my first two. My little one was not fond of my restraint. She unarmed all of her big guns in trying to get cookie after cookie into her little hands. She’s a master manipulator, this one. She should really teach lessons in ‘getting what you want.’

Now that I’m a mama, I hope that I can strike a balance between guiding my daughter on her own path of healthy eating and letting her indulge once in awhile. Forbidding things seems to be the surest way to get children fixated on them.  Plus, I believe that life is about pleasure. These cookies allow my girl to satisfy her sweet tooth all while I inject her with some much needed nutrition. Everybody wins. 😊

Raw Chia Cardamom Cocoroons

DSC_1210


Ingredients – Makes about 12 golf ball sized cookies

  • 1 1/2 cups shredded coconut
  • 1/2 cup coconut butter
  • 1/4 cup coconut flour
  • 3 tbsp coconut oil
  • 1/4 cup chia seeds
  • 1/4 cup maple syrup
  • 1 1/2 tsp almond extract
  • Seeds from one cardamom pod, grinder

Process

  1. Grind cardamom seeds in spice or coffee grinder
  2. Throw all ingredients in a food processor and process for a few seconds, until batter starts to stick together
  3. Press batter into little macaroon sized balls (or whatever shape tickles your fancy)
  4. Enjoy a few now with a hot cup of tea and save the rest in an air tight container for future taste bud pleasing

DSC_1220

XO ~ Sam

My little Marvel is 2, let’s eat cake!

My little Marvel is 2, let’s eat cake!

Tuesday was my little love’s 2nd birthday. Yes, I had a precious little Cinco de mayo baby. Poor thing will always have large groups of adults getting wasted on her birthday, a burden she shares with my hubby, born on the 4th of July. Partiers aside, it was a beautiful day full of smiles, sweets and celebrations. 🙂 Marvel has been spoiled silly this year; the celebrations began a few weeks ago at my mother’s house in LA and continued on until last night when we sat down with my in laws for dinner and more cake. I’ve eaten more birthday cake in the last three weeks than I have this entire year. I can’t complain though, I mean really, who complains about cake? The grinch maybe, or fascists? Perhaps nazis would complain about cake. Thankfully I’m none of those things. I absolutely love me some cake.

This delectable cake is a welcome reprieve from the traditional slathered in frosting, chocolate layer cake, that most birthday parties are sporting; which I totally made this last weekend for yet another of Marvel’s birthday parties. This cake is an orange and lemon bundt cake. My mother in law made this in a big flower cake pan so technically the cake you see in the pictures is not a bundt cake but it’s meant to be one. The edges are slightly crusty and taste of caramelized sugar. The inside is moist and spongy with bursts of citrus in every bite. It is an AWESOME birthday cake. Frankly, it is an awesome anytime cake. I ate a small slice after my breakfast this morning. If you haven’t had breakfast dessert yet, let me say, you are sorely missing out. It went absolutely perfectly with my green tea. I made some coconut whipped cream to serve on top and couldn’t have been happier with the pairing. I strongly suggest you serve this cake with some sort of whipped cream. The two go together like peanut butter and jelly. 🙂


Triple Citrus ‘Bundt’ Cake

Adapted from a Martha Stewart Recipe

DSC_1106DSC_1102


Ingredients

Cake

  • Coconut oil for greasing
  • 2 3/4 cups flour (I used a gluten free blend of sorghum, teff and white rice flour)
  • 3 lemons
  • 2 large oranges
  • 1 cup coconut sugar, processed super fine in a spice grinder
  • 2 tsp baking powder
  • 1 3/4 tsp salt
  • 3/4 cup coconut cream
  • 6 large eggs
  • 1 1/2 cups coconut oil

Syrup

  • 1/2 cup fresh squeezed lemon juice
  • 1/2 cup fresh squeezed orange juice
  • 1 cup coconut sugar, processed super fine in a spice grinder

Process

Cake

  1. Preheat oven to 350 degrees
  2. Grease a bundt pan with coconut oil
  3. With a sharp knife, cut away the peel and the white pith of a lemon. Holding the lemon over a bowl, cut between membranes to release segments in the bowl. Here is a handy video on how to do this. Squeeze juice from remaining membranes into another bowl. Repeat with remaining 2 lemons and 2 oranges
  4. Sift together flour, sugar, baking powder and salt into a bowl
  5. Add coconut cream and using an electric beater, beat until combined
  6. Add eggs one at a time beating to combine
  7. Beat in coconut oil and citrus juices
  8. Add citrus segments and beat on low just to combine
  9. Transfer batter to pan and bake rotating pan once until a toothpick comes out clean, about 45 minutes. (If you are using a flatter, larger pan like I did, it will take about 15 minutes less.)
  10. When cake is done, set on a wire rack to cool for about 20 minutes
  11. Transfer cake to a shallow dish
  12. Brush top and sides of cake with syrup below
  13. Add some sort of whipped cream and make your mouth happy. 🙂

Syrup

  1. Bring citrus juices and processed coconut sugar to a boil in a saucepan stirring until sugar is dissolved, boil for 30 seconds more

DSC_1170

DSC_1130DSC_1137DSC_1145


Raw Energy Balls

Raw Energy Balls

The clan and I have been doing quite a lot of traveling around these last few weeks. Moving, visiting friends, flying to LA to spend a few days with my family, driving to the beach an hour away for some fun in the sun… all of our little excursions require that we have handy sustenance for the road. Fruit and nuts are our go to car snacks but sometimes it’s nice to have a special treat to nosh on to make that hour fly by more quickly. 

These bite sized date balls are that perfect special treat. They are sweet enough to feel like an indulgence yet healthy enough to gobble up 6 of them without feeling those all too familiar pangs of regret. I whipped these up in just under 5 minutes. How groovy is that? Groovier than bell bottoms that hug John Travolta’s perfectly sculpted butt in Saturday Night Fever, I reckon. 😉 

You can dress these up with any of your favorite extras. I rolled a few of them in raw cacao powder for an elegant antioxidant boost. You could dip them in melted chocolate if you wanted a more decadent dessert ball. I found that these satisfied my ever present sweet tooth just fine as is.

Raw Energy Balls

DSC_1007
Ingredients

  • 1 cup walnuts
  • 1/2 cup Dates
  • 1/4 cup almond butter
  • 1/3 cup chia seeds
  • 1/2 cup sunflower seeds
  • 1/4 cup shredded coconut
  • 1/4 cup cacao nibs
  • 2 tbsp honey
  • 1/4 tsp salt

Process

  1. Place all ingredients in a food processor 
  2. Process until ingredients are finely chopped and starting to stick together
  3. Roll into bite sized balls and decorate however tickles your proverbial pickle. DSC_1033

XO ~ Sam

Orange and Lemon Coconut Cookies

Orange and Lemon Coconut Cookies

My daughter has been talking up a storm these days. Her favorite words seem to be Mama, Cookie, Please and Thank you; she prefers to use them in this order. Since I am such a dutiful servant mama I made her some cookies today when she asked for them. If you read my last post you will remember that I have just moved in with my parents in law. I now have many old and beautiful cookbooks at my disposal. One is titled simply, ‘Cookies’. I opened it up this morning and skimmed through while nearly drooling all over the pages. I found a recipe I liked and substituted a few things, honey for white granulated sugar, coconut flour for all purpose. The result is a very crumbly, very delicious, very toddler friendly cookie… My husband came home and ate 3 of them himself. I guess they are pretty husband friendly too. 😉

Orange and Lemon Coconut Cookies

~Paleo, Gluten Free, Vegan, Refined Sugar Free!~

DSC_0963

Ingredients

  • 1 cup coconut flour
  • 1/2 cup arrowroot flour
  • 1 tsp baking soda
  • 1/4 tsp salt
  • 3/4 cup fresh squeezed orange juice
  • 1/4 cup fresh squeezed lemon juice
  • zest of one orange
  • 1/2 cup honey, sub maple syrup if strictly vegan
  • 3 tbsp coconut oil, plus more for greasing

Process

  1. Preheat oven to 325 degrees
  2. Line a large cookie sheet with parchment paper
  3. Grease parchment paper with coconut oil
  4. In a small bowl mix together all dry ingredients, set aside
  5. In a small saucepan, heat orange, lemon juice, honey and coconut on low heat until it becomes slightly syrupy
  6. Combine dry ingredients with wet ingredients
  7. Scoop out little balls onto cookie sheet and slightly flatten with a spatula
  8. Bake for 10 minutes
  9. Nom nom nom!

These sweet little cookies are best with a cold, creamy glass of milk. I enjoy almond milk, my little one prefers goat milk. Any kind of milk will complement this cookie perfectly.

XO ~ Sam

DSC_0950

DSC_0916

Ch-ch-ch-ch-ch-ch-changes and Cheesy Herb Bread. 

Ch-ch-ch-ch-ch-ch-changes and Cheesy Herb Bread. 

Hi, my name is Sam. I’m 30 years old, married, have a 2 year old daughter and I am living with my in laws. This is a reality I could not have guessed for myself. Weren’t you supposed to have your life figured out at 30? Seems the older I get, the more I realize just how clueless I really am. Life is one big experiment and we’re all trying our best to thrive in each moment while dodging the inevitable catastrophic explosions. I won’t get in to the long story with you now but I will say this, my thyroid has been acting up and we had to rule out cancer. For those of you who aren’t familiar with that process, it’s an expensive one. Fortunately, very fortunately, I’m in the clear. Yay!! 😊 UN-fortunately, I’m down nearly 10 grand. Add that to the debt we were already nursing and you’ve got many thousand really good reasons to move in with your parents

As uncomfortable as it can be to share a space with your in laws, especially my in laws, there are enough perks that I think I can overlook the pitfalls for a few months. First, we’ll be saving nearly 3,000 dollars a month. Can you believe that? California, you are so obscenely expensive… good thing you are so effing purty. Secondly, living with my MIL means more help with my daughter. Get this – I was able to just up and drive off to my dentist appointment this morning. I didn’t have to bust my ass finding a sitter I didn’t trust or have to bring her along for a sweaty, traffic filled, hour long car ride. Nope. I.simply.went.by.myself. Gah! It was almost like I was a single unattached adult human again. Aside from the 10 minute tantrum she threw as she clung to my leg, begging me not to go of course. Trivial details darlings. Point is, having G-ma in the same house is granting me daily slivers of much needed freedom. I’m grateful to say the least. Thirdly but arguably most importantly, my MIL is a phenomenal cook. She is of Armenian descent but was born and raised in Turkey. Her cooking is fresh, vibrant, flavorful and I can taste her heritage and her love of food in every bite. She passed along this bread recipe to me yesterday. We baked together for nearly 2 hours. At the end of it I had dough in my hair, flour on my clothes and a belly full of cheese. Not a bad way to spend an afternoon, even if it is with your MIL. 😉

Gluten Free Cheesy Herb Bread 

DSC_0104

Ingredients

  • 2 1/4 cups gluten free flour, I used 1 cup buckwheat, 3/4 cup white rice and 1/2 cup garbanzo
  • 3 eggs
  • 1- 1 1/2 cup grated manchengo cheese
  • 1/4 cup dill, finely chopped
  • 1/3 bunch of italian parsley, finely chopped
  • 4 stalks of green onion, finely chopped
  • 3 tbsp sunflower oil
  • 2 tsp baking powder
  • 1 tsp salt

Process

My favorite part of cooking with my Mama in law is watching the way she does things. She moves quickly, she makes a mess and she rarely measures anything out. She made a loaf with gluten – I watched her every forceful move and then copied her, sans gluten.

  1. Preheat oven to 375 degrees
  2. Throw eggs in a bowl and using either a fork or an electric beater, beat until nice and frothy.
  3. Add in herbs, onions, oil and salt and mix together until combined – I used my clean hands. It’s more fun that way. 🙂
  4. Add in flour and baking powder and mix again until well incorporated. Since this recipe is gluten free you don’t have to worry about over mixing! You want to avoid over mixing wheat flour as it activates the gluten and can make your finished product firm, not fluffy and moist like you’d want. 
  5. Pour batter into a greased loaf pan and bake for 45 minutes.
  6. Let cool, slice and savor.

DSC_0131

DSC_0166

DSC_0169

Happy cooking loves!

XO ~ Sam

PS- Here are some of the pretty things I get to look at every day now… Maybe moving in with your in-laws isn’t all THAT bad after all. 😉

DSC_0148

DSC_0143

DSC_0138

DSC_0140

Devilishly Delicious Angelic Eggs 

Devilishly Delicious Angelic Eggs 

I’m a big proponent of morning rituals. Starting my day with healthy routines can calm and center me for the busyness that lies ahead. I begin nearly every morning with at least 5-10 minutes of Vipassana meditation. I then enjoy a glass of room temperature water with lemon to get my digestive juices flowing. Next is breakfast. My daughter and I both adore eggs. She prefers hers scrambled, I prefer mine over medium. Two eggs with a thick golden runny yolk, dripping over a slice of perfectly toasted whole grain gluten free bread, slathered with ghee and chia seeds? Oh baby. My belly is happy, I’m happy, everyone around me is happy. 🙂

Although a nice consistent morning routine centers me, the adventurer in me gets restless every once in awhile. So this morning I was inspired to get a little creative. Wanting to stick with eggs, as I’ve noticed they provide me with the best fuel for my morning, I decided on deviled. I adore me some deviled eggs. If you ever happen to find yourself at a party with me and a platter of deviled eggs and you fancy a few for yourself, I’d advise not leaving them sitting around for too long. I have absolutely no self control around those things. I’ll have popped 6 of them before you take your first bite. I may have a bit of a problem. Is there a Deviled Eggs Anonymous? No, I think not. That acronym’s already been taken after all and I doubt advertising a DEA meeting would attract very many attendees. ANYHOO…

Although I do love the little buggers as they are, in all their mayo slathered glory, I decided to play around with a more wholesome version that would still dazzle the taste buds. I think what I came up with will excite you, I’m certainly a little twitterpated by them.   😉

Devilishly Delicious Angelic Eggs

DSC_0848

Ingredients

  • 12 hard boiled eggs, peeled and cut lengthwise
  • 1 avocado
  • 1/2 cup plain goat yogurt
  • 3 tsp Apple cider vinegar
  • 4 tsp Dijon mustard
  • 1/2 tsp black pepper
  • 1/2 tsp salt
  • 1/4 tsp cumin
  • 1/4 tsp coriander
  • 1/4 tsp turmeric
  • 5 pepperoncinis finely chopped, I like this all natural brand

Process

  1. Once hard boiled eggs are cool, remove egg yolks from egg whites and place in a medium bowl. 
  2. Add in all other ingredients except pepperoncinis.
  3. Using a hand mixer on low, beat until smooth and creamy
  4. Add in pepperoncinis and gently incorporate with a spoon. 
  5. Fill the hollow egg white halves with egg yolk mixture. If you have a pastry bag, this will look the most refined. If you don’t, no worries, a spoon will do the trick. 
  6. Sprinkle the tops with a touch more of any or all of the spices used in the recipe. 
  7. Voila! Serve these with a slice of toast for breakfast or next to a big salad for lunch/dinner. 

DSC_0875

DSC_0836


Happy Eating friends! 

XO~Sam


Supermarket Musings and Beet-ganoush

Supermarket Musings and Beet-ganoush

We love Whole Foods around these parts. Yes, I mean the brick and mortar establishment. I assume the nourishing whole foods that we eat on the daily go without saying. 🙂 I can get utterly lost in Whole Foods. Their produce is absolutely gorgeous, their bulk section never ends and the layout is extremely visually captivating. The interior designer of that place needs a raise, immediately.

My love affair with Whole Foods is fairly superficial. I go inside, I look but I rarely buy. I mean who can afford those prices? Not me, not now anyway. So I longingly wander the aisles, sporting a big she boner and ultimately walk my proverbial blue balls straight on down to a place that I can afford, trusty old Berkeley Bowl.

If you don’t live in the east bay of California, it’s very likely you’ve never heard of Berkeley Bowl. Its an independent market that has only two locations. It’s nowhere near the eyegasm that Whole Foods is but dare I say, the produce selection is superior and at half the price! It’s a pretty rad supermarket and I feel lucky to have it so close, until I dump it’s ass for Whole Foods when I hit the mega jackpot that is. 😉

While I was perusing the cheese aisle of Berkeley Bowl a few days ago, I noticed an employee handing out free samples of some purple looking goop on gluten free crackers. I had my daughter with me so naturally she grabbed at it. She acts like a starved homeless child around other people’s food but at our dinner table, she often can’t be bothered. She may be single handedly responsible for my growing wrinkles. Anyway, after further inspection I realized the spread was made of beets. What an awesome idea I thought. The flavor was pretty good but I knew I could improve upon it. I was excited to get home and play.

Beet-ganoush

DSC_0207

Ingredients

  • 4 beets, boiled and peeled
  • 1/2 cup soaked almonds
  • 1/4 cup tahini
  • 1 tbsp miso
  • 2-3 cloves of garlic
  • 1 tbsp olive oil
  • juice of 1 large lemon
  • 1/2 tsp salt
  • 1/4 tsp cumin

Process

  1. Place beets in a food processor and process until smooth and creamy
  2. Add in all other ingredients and process until well combined
  3. Spread on crackers, cucumbers or use as a spread for a sandwich… this would be incredible on so many things, your imagination is the limit.

DSC_0223

Nom nom nom nom…

XO ~Sam

DSC_0216DSC_0229


Gluten Free Chocolate Cake with Vegan Chocolate Frosting  

Gluten Free Chocolate Cake with Vegan Chocolate Frosting  

Today, I had a flash back of a really sweet moment in my childhood. I was 8 maybe 9, sitting at our dinner table with my brother, 6 and sister, still in diapers; chocolate smeared our faces as we chugged down ice cold milk. The milk was always ice cold in our house. My mother insisted it be so. Although I don’t drink cows milk anymore, I’d still have to agree with her; milk tastes best just before it freezes and accompanied by chocolate. Always. 

In this instance the chocolate that lined our smiling mouths was frosting from a chocolate cake. This seemingly insignificant memory danced around my head all morning. I could smell the frosting, I could feel the crumble of the cake in my mouth. It was slowly driving me mad! I knew I had to make one. 

The cake of my memories was a boxed Betty Crocker creation, no doubt. My mama was never much of a baker. I was inspired to create my own take on the delicious yet overly processed box version. It had been awhile since I used butter and sugar to create anything. In the interest of health, I’ve been going for coconut oil in lieu of butter and honey or maple syrup to substitute granulated sugar when baking. Although I believe the flavor rarely suffers with these substitutions, the texture inevitably does. Sugar and butter can create a more tender, moist baked good. For this cake, I wanted to create something as close to the original as I could get while using organic whole foods to make it happen. I think I succeeded. Here’s what I did,  

(Recipe adapted from Tasting Table)

Gluten Free Chocolate Cake with Vegan Chocolate Frosting 

Ingredients:         

Chocolate Cake:

  • 1 cup cacao powder
  • 1 cup filtered water
  • 4 oz unsweetened baking chocolate 
  • 2 cups gluten free all propose flour (I made my own using 1/2 cup potato starch, 3/4 cup white rice flour, 1/2 cup sorghum flour and 1/4 cup teff flour)
  • 1/4 tsp salt
  • 1 1/2 tsp baking soda 
  • 1 1/2 sticks grass fed butter, kerrygold is my all time favorite. 
  • 1 1/2 cups coconut sugar 
  • 5 eggs
  • 3/4 cup goat milk

Vegan Chocolate Frosting


  • 8 oz unsweetened baking chocolate, chopped 
  • The cream from one can of coconut milk, refrigerated overnight or frozen for a few hours
  • 1/2 cup almond milk
  • 1/4 cup cacao powder
  • 8 tbsp coconut oil 
  • 2 tsp vanilla 

Process

  1. Preheat oven to 350 degrees 
  2. Grease two 9-inch cake pans with oil or butter of choice and dust with cocoa powder, tapping out the excess.
  3. In a small bowl, stir the cocoa powder with the water until you form a paste.
  4. Using a double boiler or a small glass bowl atop a tea kettle, melt your 12 oz total of baking chocolate 
  5. Mix flour, baking soda and salt together well in a large bowl
  6. Using a stand mixer or an electric hand mixer, beat the sugar and butter together until smooth. 
  7. While still beating, add one egg at a time to butter and sugar mixture. 
  8. Lower beater speed and add cacao powder paste and melted chocolate
  9. Add flour and milk a bit a time to ensure mixture doesn’t get too chunky and combines well 
  10. Place batter evenly into greased cake pans 
  11. Place in middle of oven for 30 minutes
  12. Meanwhile make frosting – Take can of coconut milk out of fridge/freezer and scoop out the separated coconut cream from the top.
  13. In a small saucepan over medium heat, warm the coconut cream and sugar, stirring often until the sugar dissolves, about 2 to 3 minutes
  14. Place the remaining 8 oz of chopped chocolate in a medium-large bowl.
  15. Pour the warm cream over the chocolate and let sit for 2 to 3 minutes or until the chocolate begins to soften. Whisk until smooth and allow to sit for another 5 to 7 minutes to cool slightly.
  16. Whisk the coconut oil into the chocolate, adding 1 tbsp at a time and whisking until it’s blended in before adding the next.
  17. Let frosting set in the refrigerator for an hour or so before taking out and adding cacao powder, milk and vanilla. 
  18. Using an electric beater, mix cacao powder and milk into frosting until it becomes thick and creamy 
  19. To assemble the cake, place one of the cake layers bottom-side up on a cake plate or platter. Using an offset metal spatula, ice with about 1 cup of the frosting. Place the second layer, also bottom-side up, on top of the frosting. Spread the remaining frosting over the sides and top of the entire cake. 
  20. Dig in! Preferably with a cold glass of milk, I prefer the almond variety. 😉 DSC_0052